In the previous post, we discussed the usage and examples of the
Spring Initialzr URL : Spring Initilazr
Select Maven project and dependencies. Fill other details like Group, Artifact and click on generate project.
I have selected Web, JPA, DevTools and Actuator as dependencies.

When click on "Generate Project" , it will ask for download project, will download the zip file.
Extract the downloaded project file, and import into eclipse tool.
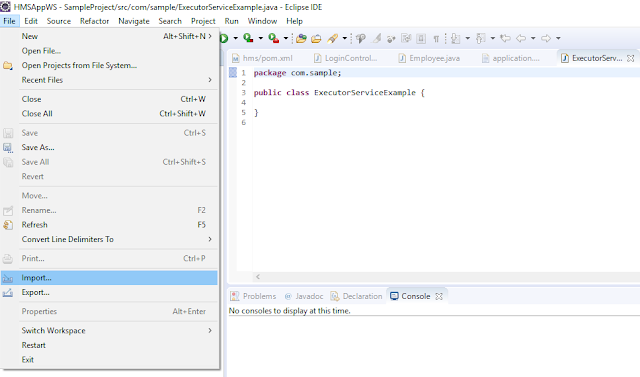
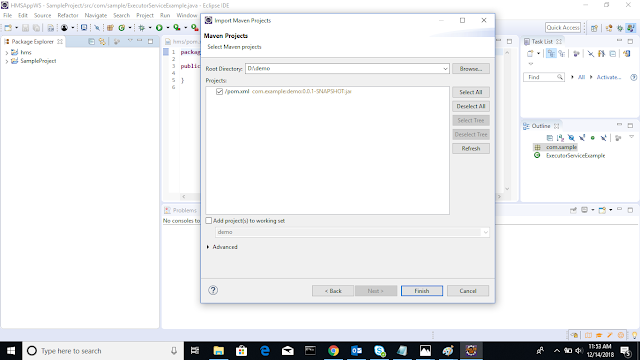
Select Existing Maven Project, browse the extracted project directory.

Next,

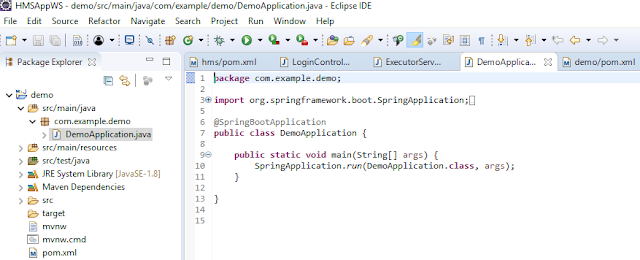
The main class DemoApplication.java,
The pom.xml,
Thank you for visiting blog.
Related Posts:--
1) The @SpringBootApplication Annotation usage and example
2) Explain advantages of Spring Boot
3) Causes and Solution of NoSuchBeanDefinitionException in Spring.
4) Cause and solution of LazyInitializationException in Hibernate
@SpringBootApplication annotation. In this post, we'll learn how to create a Spring Boot application using Spring Initializr.One of the biggest challenges when getting started with a new framework is the initial project setup, especially if you're starting from scratch without an existing project as a reference. Spring Initializr simplifies this process by generating a ready-to-use Spring Boot project with the required configuration.
Spring Initializr is a web-based tool provided by Spring that helps you create a Spring Boot application. It is especially useful for beginners, as it generates the initial project structure and configuration, allowing you to focus on developing your application instead of setting up the project manually.
Spring Initialzr URL : Spring Initilazr
Select Maven project and dependencies. Fill other details like Group, Artifact and click on generate project.
I have selected Web, JPA, DevTools and Actuator as dependencies.

Extract the downloaded project file, and import into eclipse tool.

Select Existing Maven Project, browse the extracted project directory.

Next,

The demo project has now been imported into Eclipse.
The project structure looks like the following:
The project structure looks like the following:

The main class DemoApplication.java,

The pom.xml,
<?xml version="1.0" encoding="UTF-8"?>
<project xmlns="http://maven.apache.org/POM/4.0.0" xmlns:xsi="http://www.w3.org/2001/XMLSchema-instance"
 xsi:schemaLocation="http://maven.apache.org/POM/4.0.0 http://maven.apache.org/xsd/maven-4.0.0.xsd">
 <modelVersion>4.0.0</modelVersion>
 <parent>
     <groupId>org.springframework.boot</groupId>
     <artifactId>spring-boot-starter-parent</artifactId>
      <version>2.1.1.RELEASE</version>
      <relativePath/> <!-- lookup parent from repository -->
 </parent>
    <groupId>com.example</groupId>
    <artifactId>demo</artifactId>
    <version>0.0.1-SNAPSHOT</version>
    <name>demo</name>
    <description>Demo project for Spring Boot</description>

 <properties>
       <java.version>1.8</java.version>
 </properties>

 <dependencies>
      <dependency>
           <groupId>org.springframework.boot</groupId>
           <artifactId>spring-boot-starter-actuator</artifactId>
      </dependency>
      <dependency>
          <groupId>org.springframework.boot</groupId>
          <artifactId>spring-boot-starter-data-jpa</artifactId>
      </dependency>
      <dependency>
          <groupId>org.springframework.boot</groupId>
          <artifactId>spring-boot-starter-web</artifactId>
      </dependency>

      <dependency>
          <groupId>org.springframework.boot</groupId>
          <artifactId>spring-boot-devtools</artifactId>
          <scope>runtime</scope>
      </dependency>
      <dependency>
          <groupId>org.springframework.boot</groupId>
          <artifactId>spring-boot-starter-test</artifactId>
          <scope>test</scope>
      </dependency>
 </dependencies>

 <build>
    <plugins>
       <plugin>
           <groupId>org.springframework.boot</groupId>
           <artifactId>spring-boot-maven-plugin</artifactId>
       </plugin>
    </plugins>
 </build>

</project>
Thank you for visiting blog.
Related Posts:--
1) The @SpringBootApplication Annotation usage and example
2) Explain advantages of Spring Boot
3) Causes and Solution of NoSuchBeanDefinitionException in Spring.
4) Cause and solution of LazyInitializationException in Hibernate

No comments:
Post a Comment